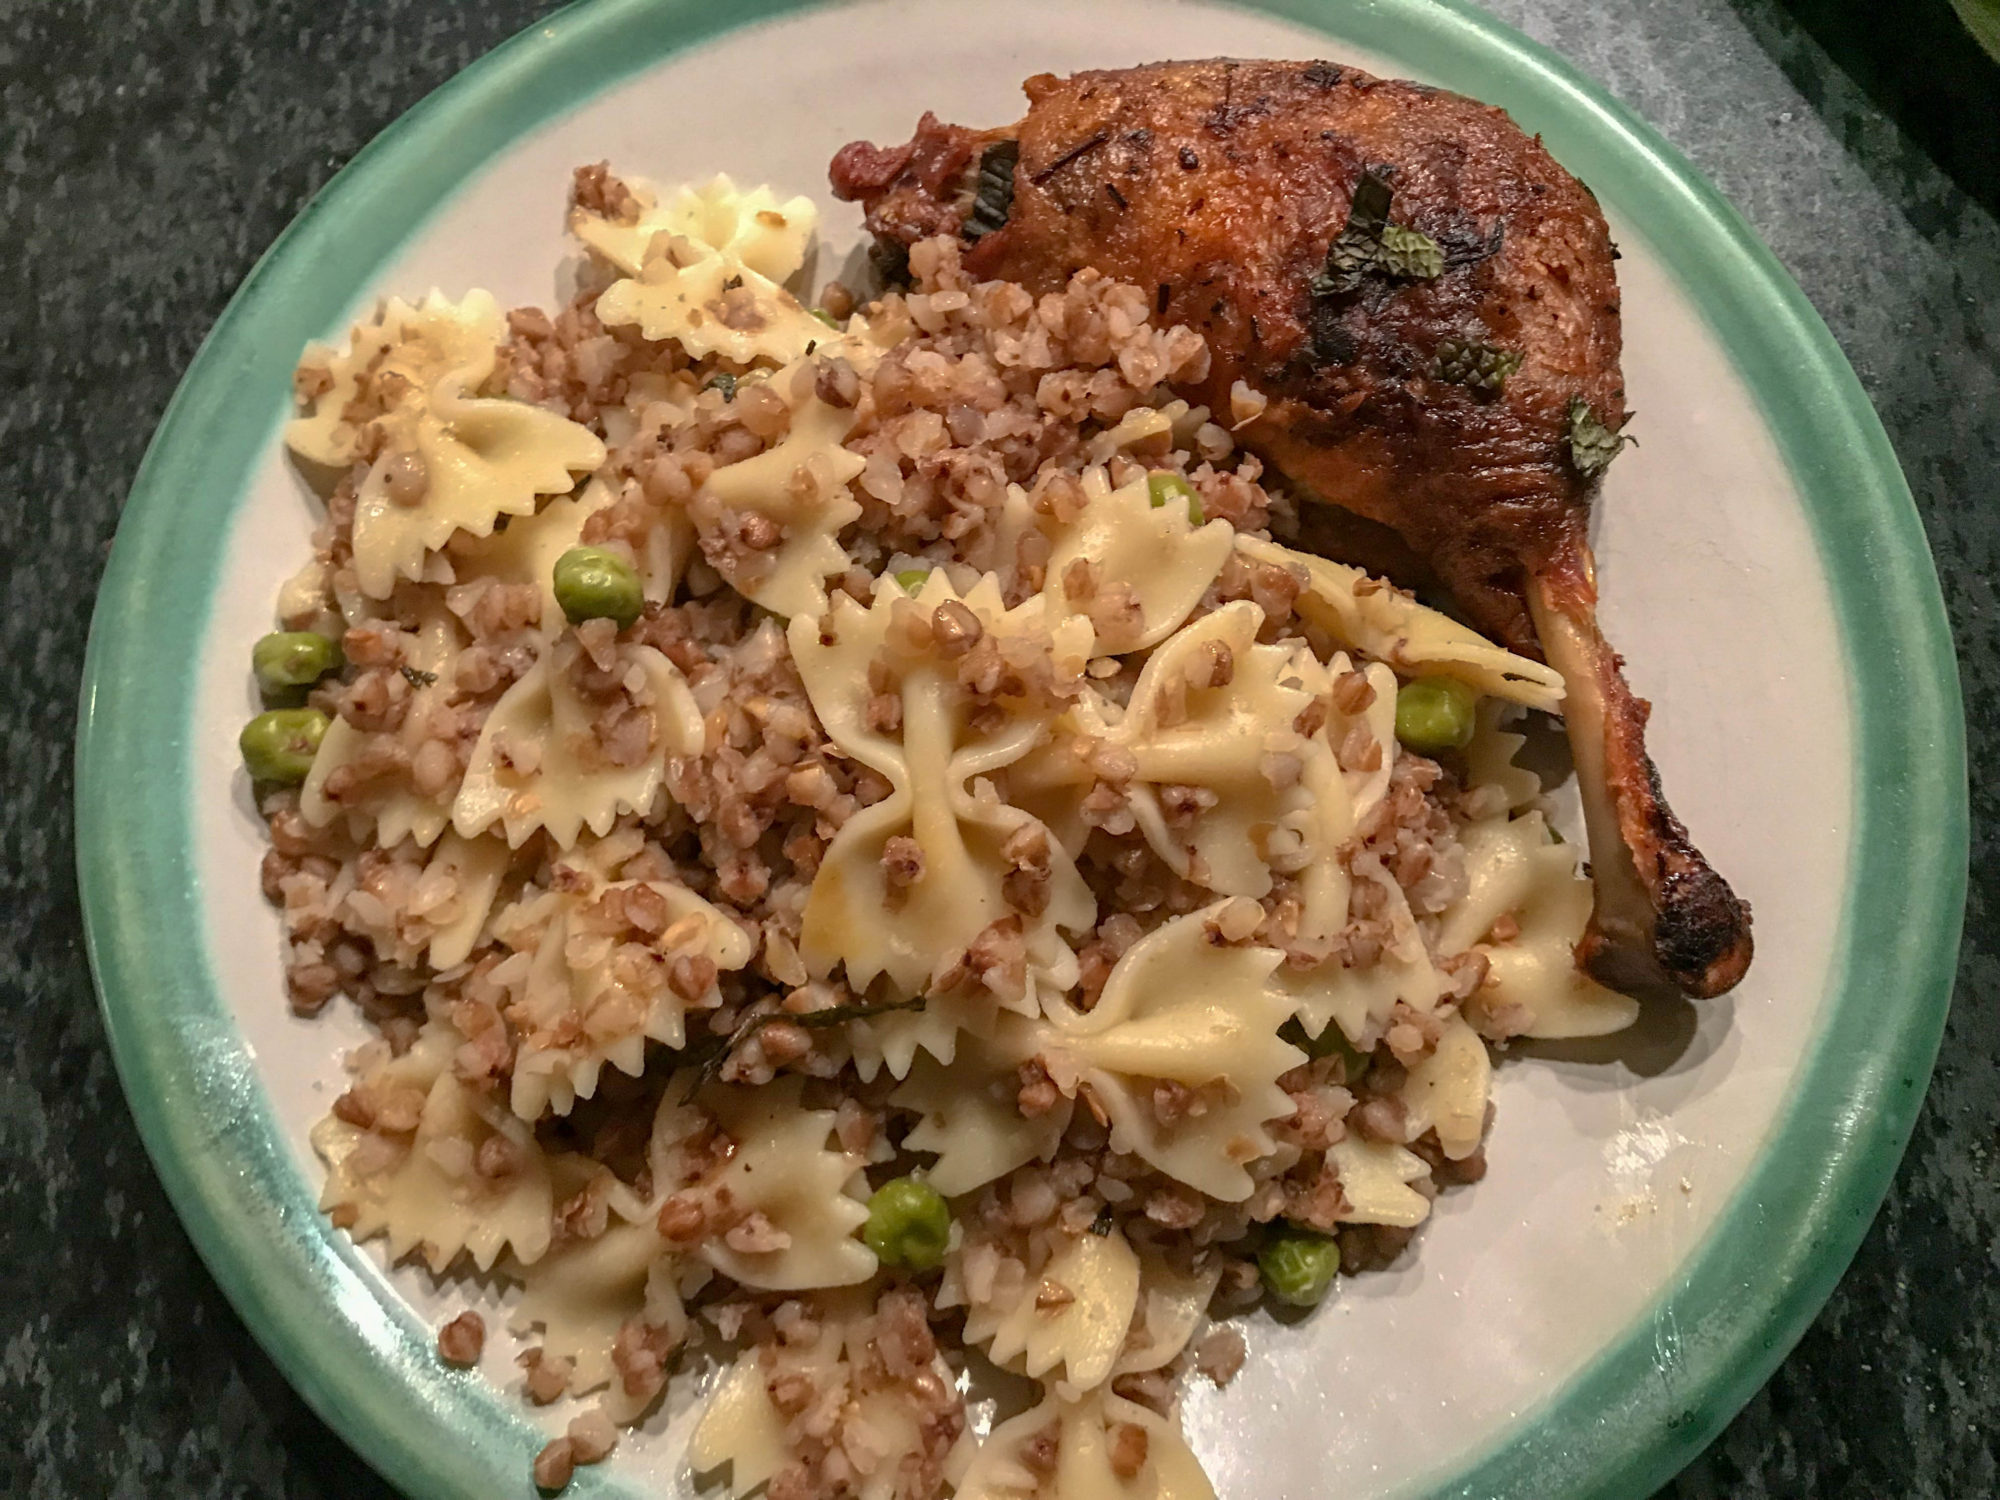
The classic buckwheat and bowties version from my youth - except for the peas.
Pretend your box of buckwheat is like an elementary school. Your goal is to let each little groat shine on its own. So to start with, buy whole grain kasha, as opposed to coarse, medium or fine. Then, raise its self-esteem: feed it some protein, then rub it up with a little schmaltz before you pour on the hot water.
Kasha Varnishkes is most often made as a side dish to accompany some type of juicy roast, but it also makes a serious vegetarian main. You have the further choice of assembling and serving the same day, or letting things rest until you're ready. The components do well with a time out in the fridge, a final assembly, and a brief sprint in the oven. In the directions below, we'll try and have it every possible way.
In a large fry pan, saute the diced onion in the 2 T of fat or oil over medium heat until golden, about 8 to 10 minutes. Meanwhile, pour the dry buckwheat grains into a large saucepan or medium casserole, and mix in the beaten egg. Turn the heat to medium high and stir very frequently, until the mixture is no longer clumpy. In about 8 to 10 minutes, the grains should separate, you'll have a nice toasty smell, and the buckwheat may color a little bit - don't let it burn.
Scrape the onion mixture into the kasha pot and continue cooking and stirring another minute or two, to seal the groats in onion-flavored fat. Add the water or broth, and the salt and pepper. Bring all to a boil, then cover and let simmer, without stirring, over low heat until all, or nearly all, of the liquid is absorbed - about 30 minutes. Remove from heat, place a folded dish towel between the pot and its lid, and let it sit for another 10 or 15 minutes.
To proceed right away to the varnishke stage, keep the kasha warm in its pot while you boil up the pasta as per usual, or per the package directions. Drain well. Fluff the kasha into the pasta pot, adjust seasonings, then turn into a serving dish. Drizzle with the extra 2 T of melted butter or a nice flavored oil like basil EVOO or walnut. Or - if you have a few minutes and can pay attention - run the dish under the broiler until just a few of the outermost pasta pieces get a bit brown and crispy at the edges. This quantity will serve 4 to 6 as a side dish, 3 to 4 as a vegetarian main course.
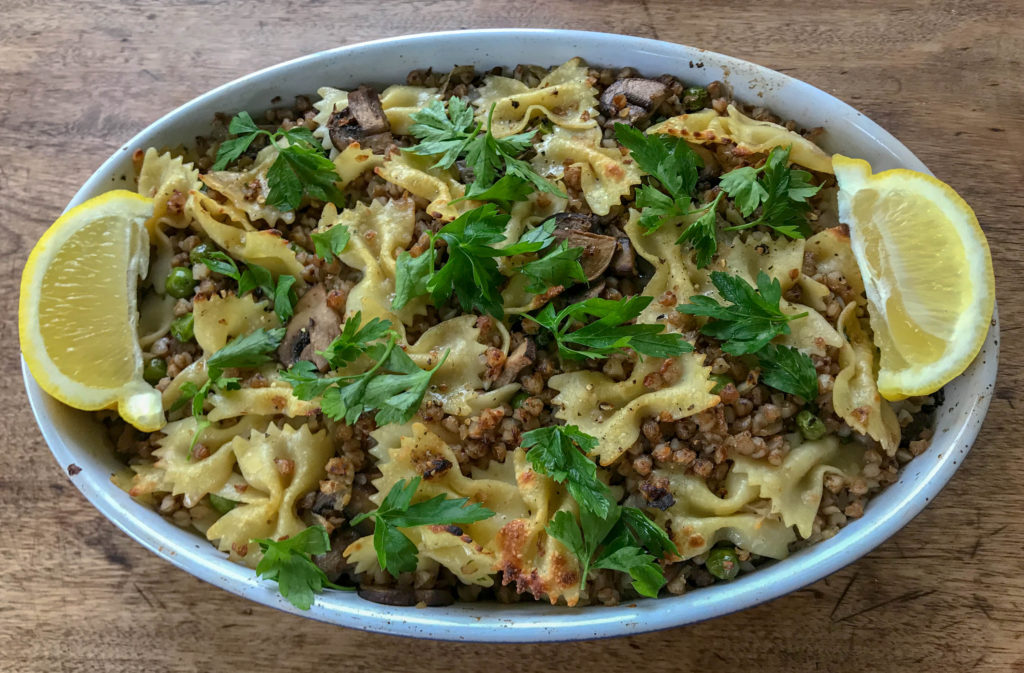
To set this all up ahead of time - which is great, particularly when the kasha is part of a larger meal that will already have you frazzled - just keep all the ingredients in the fridge overnight, either together or separate. When you're ready, preheat the oven to 350, put the kasha varnishkes into an ovenproof serving dish, and add a half cup of extra stock or water. Cover tightly and bake for 30 minutes, or until quite steamy. Remove cover, drizzle with the extra oil or butter, broil briefly to brown up, if you have time, and serve forth.
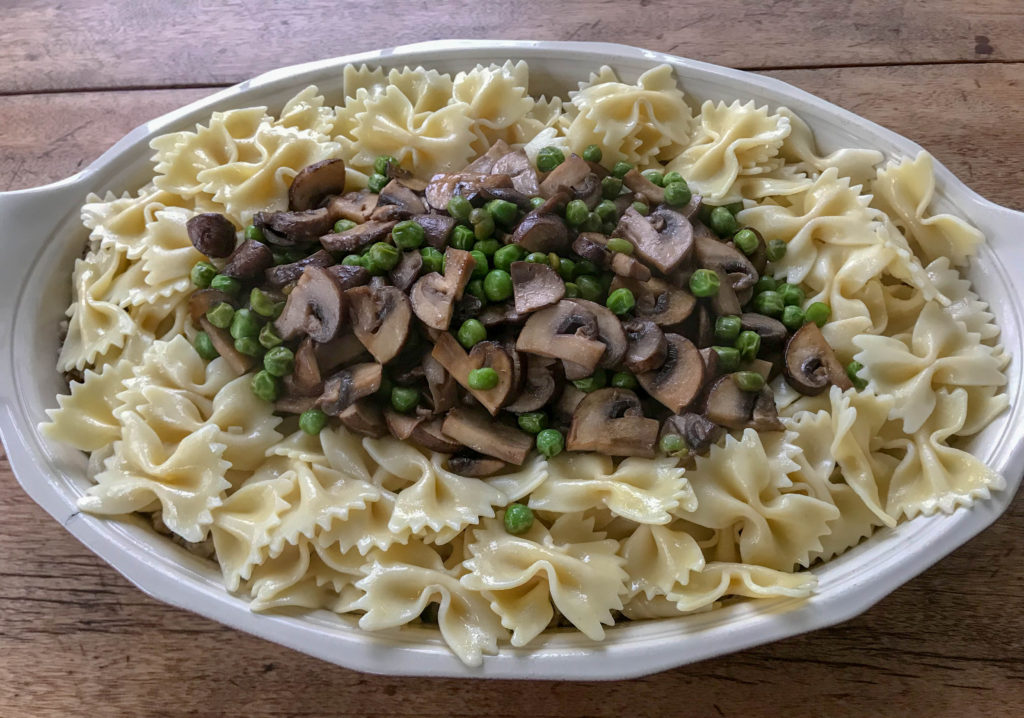
I do like to make kasha varnishkes ahead of time, and I do like mushrooms and peas, and I can't resist assembling the whole thing nicely on a plate for my guests to destroy as it's served, in which case you don't even see the buckwheat lurking below. I do the mushrooms separately because I like to fry the kasha with the onions - mushrooms will absorb all the fat, leaving none to coat the groats.
Now that we've settled that: fry the sliced mushrooms in the butter and oil over medium high heat until almost done, about 6 to 8 minutes. Add the frozen peas, salt and pepper to taste. Stir once or twice, until the peas defrost. Add the water or sherry, cover, reduce heat to medium, and let simmer another 2 or 3 minutes, until the peas are ready. Assemble and serve as described above; either right away or after a stint in the oven.
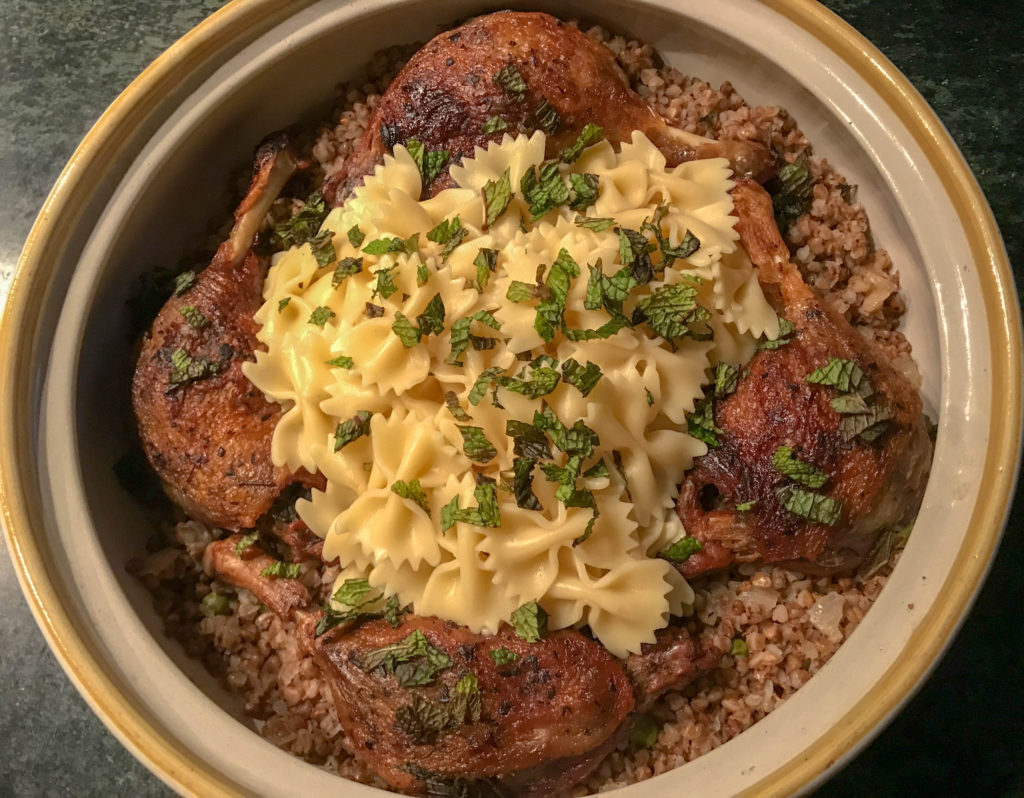
I got obsessed, at some point, with wanting to roast some duck legs to make ducky varnishkes. I thought the duck - and the duck fat - would go particularly well with the kasha. I was right on both counts, but what was really nice was to shred the very well-cooked duck meat into the grains and eat it in incorporated bites. It would be worth doing a couple of extra duck legs so you could premix them in, as well as serve them on the side. Maybe with chickpeas. Maybe next time.
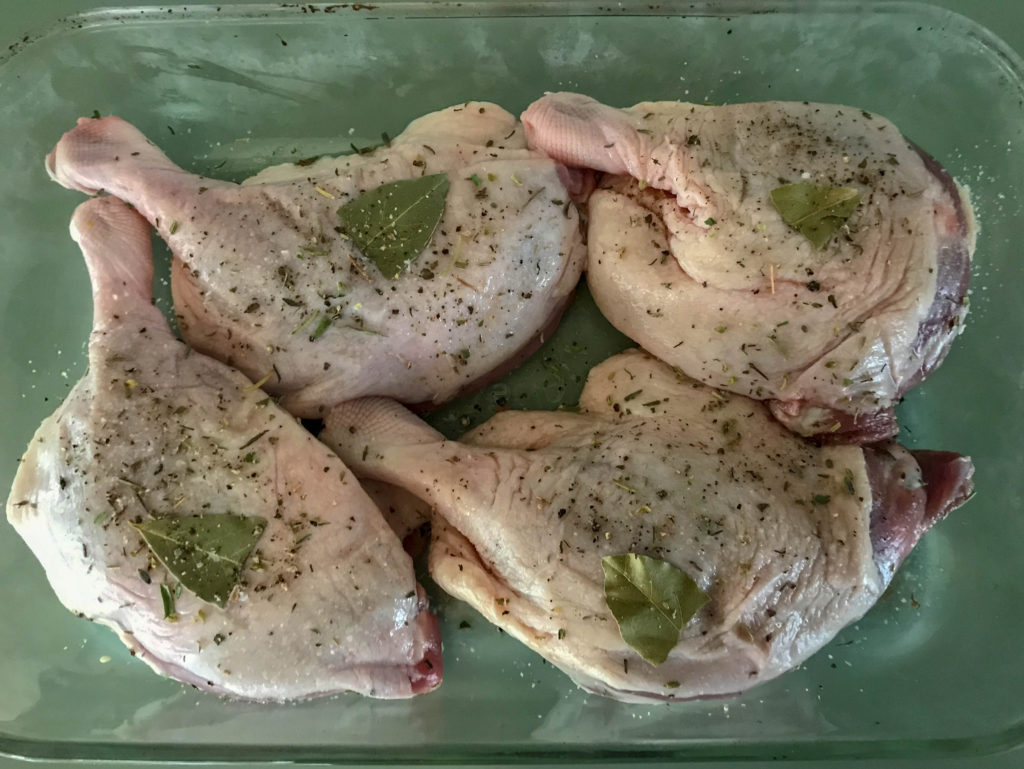
To roast the duck, we'll tweak a popular NY Times recipe from the redoubtable and prolific Melissa Clark for Easy Duck Confit. Start a day or two ahead of time and give it a cure - sprinkle on the salt and pepper and the herbs, and let it sit overnight in the fridge. The next day, preheat oven to 325. Remove the bay leaves and saute the duck legs, skin side down, in a large ovenproof skillet over medium heat, about 20 to 25 minutes. You should have gently browned skin, and a good quarter inch of fat.
Flip the duck legs skin side up, cover the pan tightly with foil, and roast for an hour and a half. Remove the foil and roast another half hour, or until the skin is quite crisp. Drain and reserve the precious duck fat.
When you make the kasha varnishkes, use the duck fat to saute the onions and the kasha grains before boiling them together and adding the bowties, etc. For this recipe, it makes good logistical sense to arrange the duck legs over the kasha and reheat in the aforementioned 350 degree oven for a half hour, tightly covered. To serve, toss the cooked pasta in the remaining duck fat, then pile the noodles into the center of the serving dish, and garnish with parsley or mint.
Ingredients
Directions
Pretend your box of buckwheat is like an elementary school. Your goal is to let each little groat shine on its own. So to start with, buy whole grain kasha, as opposed to coarse, medium or fine. Then, raise its self-esteem: feed it some protein, then rub it up with a little schmaltz before you pour on the hot water.
Kasha Varnishkes is most often made as a side dish to accompany some type of juicy roast, but it also makes a serious vegetarian main. You have the further choice of assembling and serving the same day, or letting things rest until you're ready. The components do well with a time out in the fridge, a final assembly, and a brief sprint in the oven. In the directions below, we'll try and have it every possible way.
In a large fry pan, saute the diced onion in the 2 T of fat or oil over medium heat until golden, about 8 to 10 minutes. Meanwhile, pour the dry buckwheat grains into a large saucepan or medium casserole, and mix in the beaten egg. Turn the heat to medium high and stir very frequently, until the mixture is no longer clumpy. In about 8 to 10 minutes, the grains should separate, you'll have a nice toasty smell, and the buckwheat may color a little bit - don't let it burn.
Scrape the onion mixture into the kasha pot and continue cooking and stirring another minute or two, to seal the groats in onion-flavored fat. Add the water or broth, and the salt and pepper. Bring all to a boil, then cover and let simmer, without stirring, over low heat until all, or nearly all, of the liquid is absorbed - about 30 minutes. Remove from heat, place a folded dish towel between the pot and its lid, and let it sit for another 10 or 15 minutes.
To proceed right away to the varnishke stage, keep the kasha warm in its pot while you boil up the pasta as per usual, or per the package directions. Drain well. Fluff the kasha into the pasta pot, adjust seasonings, then turn into a serving dish. Drizzle with the extra 2 T of melted butter or a nice flavored oil like basil EVOO or walnut. Or - if you have a few minutes and can pay attention - run the dish under the broiler until just a few of the outermost pasta pieces get a bit brown and crispy at the edges. This quantity will serve 4 to 6 as a side dish, 3 to 4 as a vegetarian main course.

To set this all up ahead of time - which is great, particularly when the kasha is part of a larger meal that will already have you frazzled - just keep all the ingredients in the fridge overnight, either together or separate. When you're ready, preheat the oven to 350, put the kasha varnishkes into an ovenproof serving dish, and add a half cup of extra stock or water. Cover tightly and bake for 30 minutes, or until quite steamy. Remove cover, drizzle with the extra oil or butter, broil briefly to brown up, if you have time, and serve forth.
I do like to make kasha varnishkes ahead of time, and I do like mushrooms and peas, and I can't resist assembling the whole thing nicely on a plate for my guests to destroy as it's served, in which case you don't even see the buckwheat lurking below. I do the mushrooms separately because I like to fry the kasha with the onions - mushrooms will absorb all the fat, leaving none to coat the groats.
Now that we've settled that: fry the sliced mushrooms in the butter and oil over medium high heat until almost done, about 6 to 8 minutes. Add the frozen peas, salt and pepper to taste. Stir once or twice, until the peas defrost. Add the water or sherry, cover, reduce heat to medium, and let simmer another 2 or 3 minutes, until the peas are ready. Assemble and serve as described above; either right away or after a stint in the oven.

I got obsessed, at some point, with wanting to roast some duck legs to make ducky varnishkes. I thought the duck - and the duck fat - would go particularly well with the kasha. I was right on both counts, but what was really nice was to shred the very well-cooked duck meat into the grains and eat it in incorporated bites. It would be worth doing a couple of extra duck legs so you could premix them in, as well as serve them on the side. Maybe with chickpeas. Maybe next time.

To roast the duck, we'll tweak a popular NY Times recipe from the redoubtable and prolific Melissa Clark for Easy Duck Confit. Start a day or two ahead of time and give it a cure - sprinkle on the salt and pepper and the herbs, and let it sit overnight in the fridge. The next day, preheat oven to 325. Remove the bay leaves and saute the duck legs, skin side down, in a large ovenproof skillet over medium heat, about 20 to 25 minutes. You should have gently browned skin, and a good quarter inch of fat.

Flip the duck legs skin side up, cover the pan tightly with foil, and roast for an hour and a half. Remove the foil and roast another half hour, or until the skin is quite crisp. Drain and reserve the precious duck fat.
When you make the kasha varnishkes, use the duck fat to saute the onions and the kasha grains before boiling them together and adding the bowties, etc. For this recipe, it makes good logistical sense to arrange the duck legs over the kasha and reheat in the aforementioned 350 degree oven for a half hour, tightly covered. To serve, toss the cooked pasta in the remaining duck fat, then pile the noodles into the center of the serving dish, and garnish with parsley or mint.

Leave a Reply