
A few years ago I was standing in my front yard staring concernedly at something, when an older gentleman stopped by and told me that he used to live in my house. We had a great chat. Among many other things, he told me that my backyard used to be planted in buckwheat.
“Did you eat that, then?” I asked, wondering if he could possibly be Jewish.
“No, no,” he explained. “It was to attract the pheasants. We used to shoot them from the back step.” He went on to tell me it was actually illegal, except during hunting season. But my house was far enough out from the center of town that they didn’t worry about that too much.
Today, of course, if I fired a shotgun in my backyard an armored SWAT vehicle would be lobbing tear gas canisters at me within minutes. That’s progress, I guess. One thing hasn’t changed, though – whole buckwheat is still mostly seen as bird food.
Unlike amaranth, freekeh, farro, kamut, quinoa, sorgum and teff, buckwheat has missed out on the ancient whole grains bandwagon. It’s basically too old to be rediscovered. In the grain world, once you’ve been ground up into blini and slathered in caviar, it’s too late to play the ingenue.
But whole buckwheat, besides being an Oprah-endorsed superfood, is good stuff. Toasted, it has a hazelnut aroma and a soft texture that improves with rest. It wants to be handled rather leisurely, in stages – mixed with egg and retoasted in a dry pan, glossed with hot fat and simmered for a good half hour, then allowed to sit, steaming into a dish towel, for another 10 or fifteen minutes.
Rush things, and it tends to disintegrate. Fluff it up and leave it overnight in the fridge and the grains will stay nicely separate, ready for reheating in the oven or microwave.
It can be a tiny challenge to find the buckwheat format you need. In my own local super, kasha is never seen in the natural foods aisle. The little retro boxes packaged by Wolff’s are only found in the kosher section, next to the tubes of barley and Israeli couscous. Bob’s Red Mill makes a great-looking product in economic quantities, but I have yet to find it locally.
Wherever you find your kasha, try to get the whole grain variety for these recipes. If it’s not available, you can work with coarse. It’s not as nutty and the grains aren’t as distinct, but it will cook in half the time. Medium and fine grade kasha is basically oatmeal – it cooks into mush. Delicious mush, if you like, but I am not an oatmeal guy.
No one seems to know why Jews in the Russian Pale started mixing pasta with grains. I expect they were just being frugal with leftover soup noodles, but according to Mitchell Davis, author of The Mensch Chef and one of my beloved food authorities, even the term varnishkes is obscure. Here, too, I just assumed it meant “garnished”, which is garnishte in Yiddish, which is close enough for me.
However it came about, this is great, basic, cheap, protein-laden and filling; exactly what you need to keep the wolves at bay and the Olympic medals coming.
_____________________
Kasha varnishkes has been around a long time, lurking in the side dish section of many a deli menu. I’m not sure whether it’s because it’s steam table friendly, truly and amazingly delicious, or just funny to say. It is definitely filling, comforting and a little bit curious – why bow ties? Why pasta with grains in the first place? What is a varnishke? The only answer is the dish itself. Despite the modern pasta shape this is an ancient flavor, nutlike and nutritious. Foodwise, it’s biblical. Wordwise, it sounds like the stage name of a Catskills comedian. Folks – you gotta try it. It’s there all week.
Kasha Varnishkes
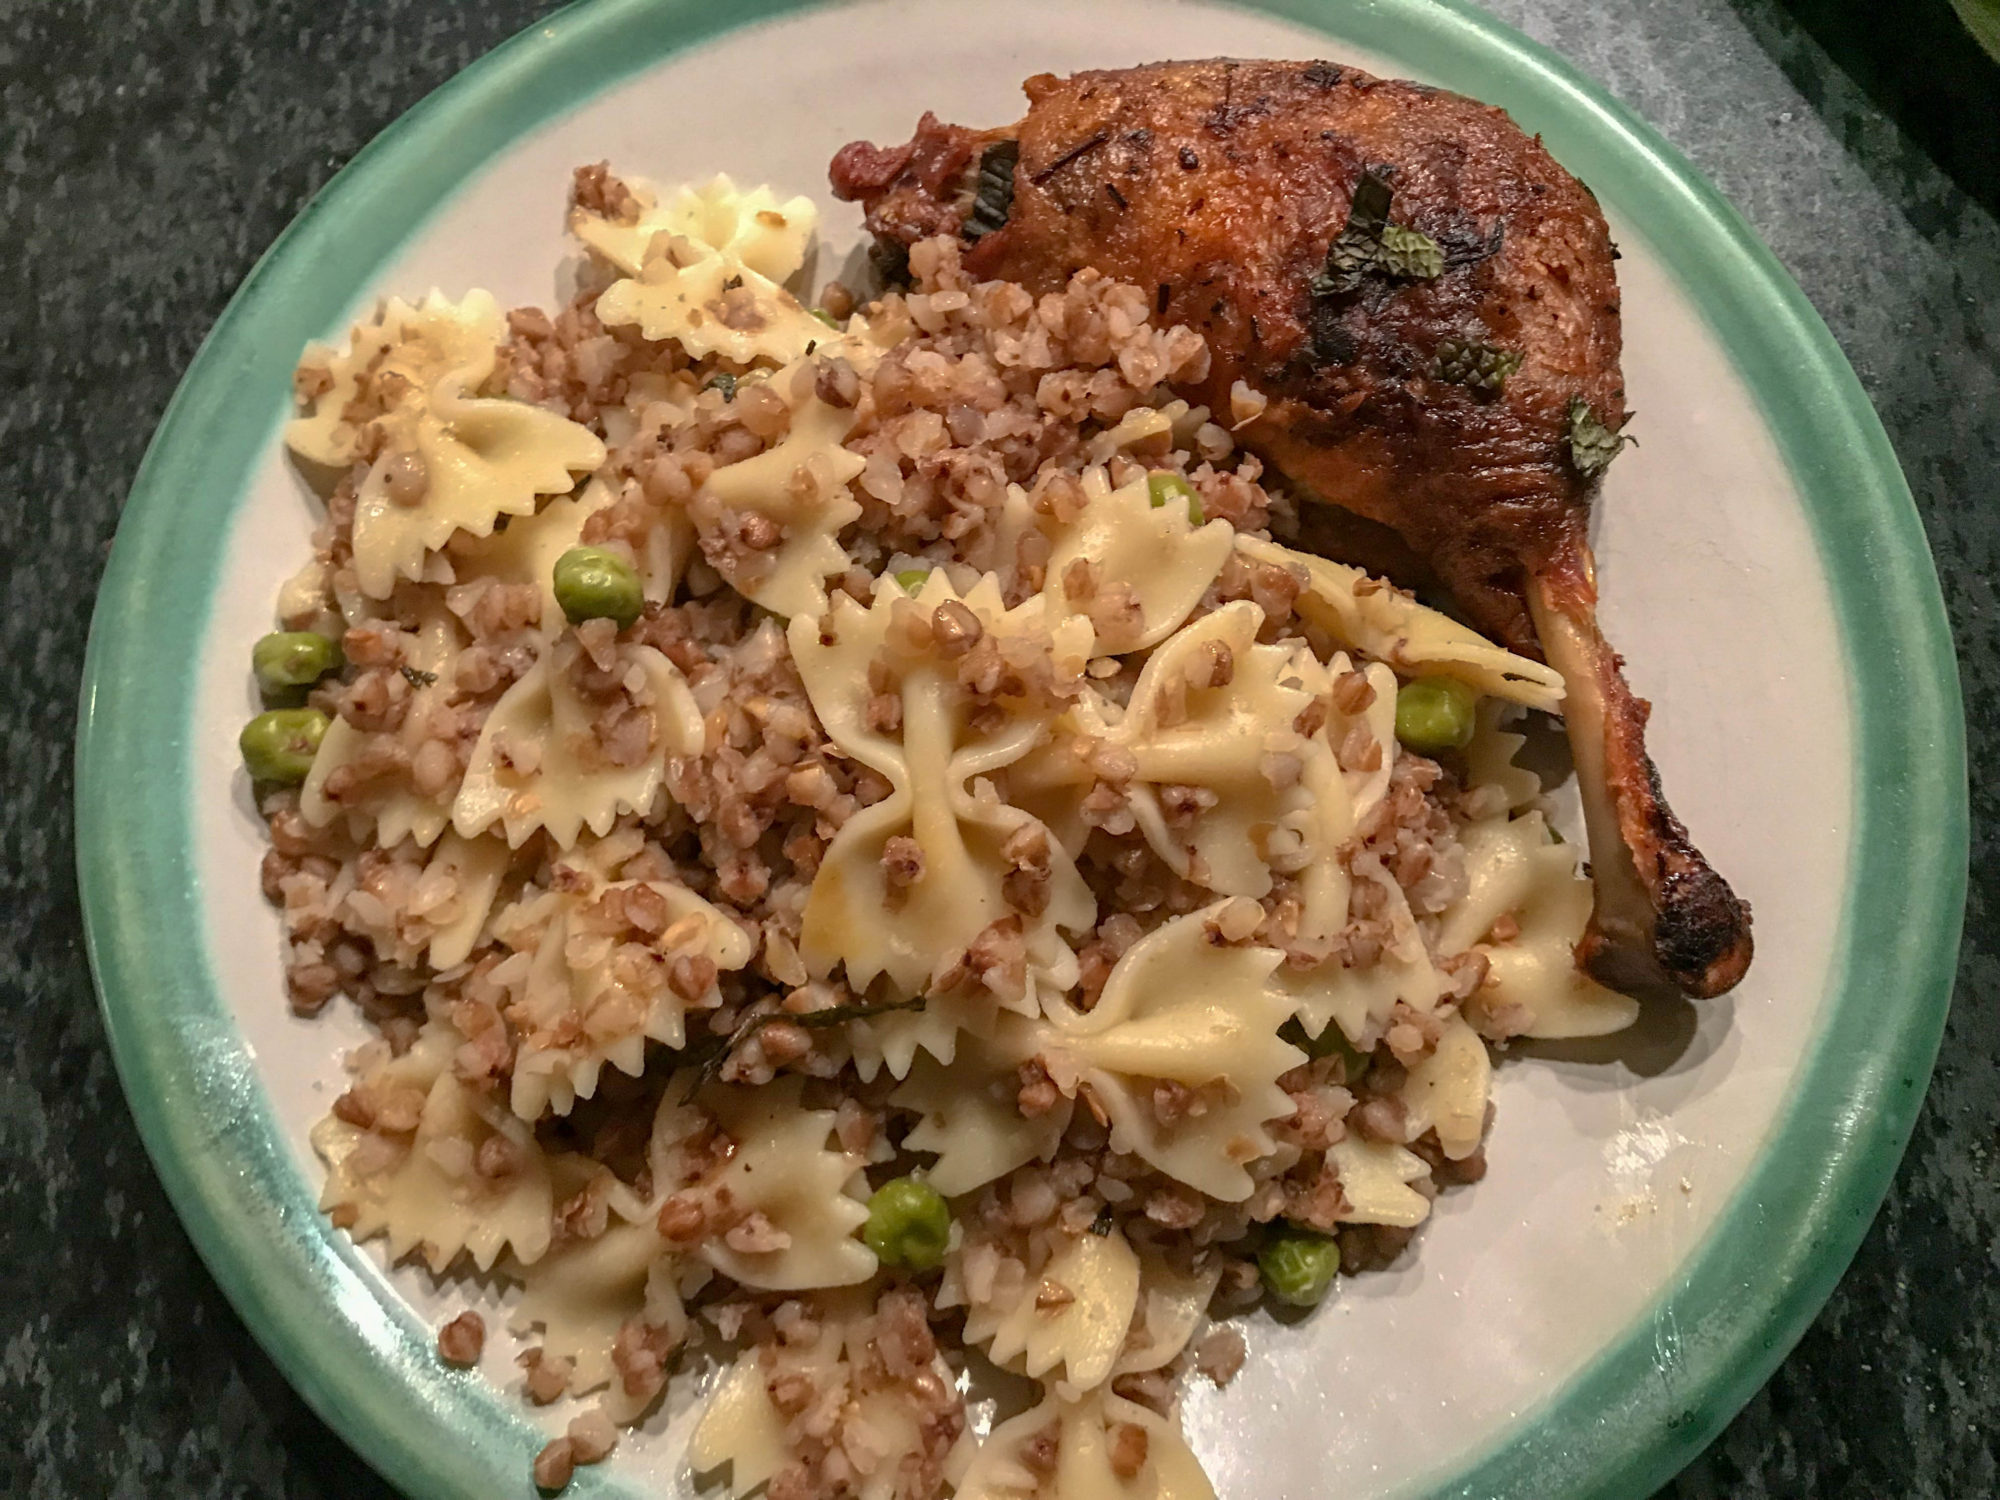
The classic buckwheat and bowties version from my youth - except for the peas.
Pretend your box of buckwheat is like an elementary school. Your goal is to let each little groat shine on its own. So to start with, buy whole grain kasha, as opposed to coarse, medium or fine. Then, raise its self-esteem: feed it some protein, then rub it up with a little schmaltz before you pour on the hot water.
Kasha Varnishkes is most often made as a side dish to accompany some type of juicy roast, but it also makes a serious vegetarian main. You have the further choice of assembling and serving the same day, or letting things rest until you're ready. The components do well with a time out in the fridge, a final assembly, and a brief sprint in the oven. In the directions below, we'll try and have it every possible way.
In a large fry pan, saute the diced onion in the 2 T of fat or oil over medium heat until golden, about 8 to 10 minutes. Meanwhile, pour the dry buckwheat grains into a large saucepan or medium casserole, and mix in the beaten egg. Turn the heat to medium high and stir very frequently, until the mixture is no longer clumpy. In about 8 to 10 minutes, the grains should separate, you'll have a nice toasty smell, and the buckwheat may color a little bit - don't let it burn.
Scrape the onion mixture into the kasha pot and continue cooking and stirring another minute or two, to seal the groats in onion-flavored fat. Add the water or broth, and the salt and pepper. Bring all to a boil, then cover and let simmer, without stirring, over low heat until all, or nearly all, of the liquid is absorbed - about 30 minutes. Remove from heat, place a folded dish towel between the pot and its lid, and let it sit for another 10 or 15 minutes.
To proceed right away to the varnishke stage, keep the kasha warm in its pot while you boil up the pasta as per usual, or per the package directions. Drain well. Fluff the kasha into the pasta pot, adjust seasonings, then turn into a serving dish. Drizzle with the extra 2 T of melted butter or a nice flavored oil like basil EVOO or walnut. Or - if you have a few minutes and can pay attention - run the dish under the broiler until just a few of the outermost pasta pieces get a bit brown and crispy at the edges. This quantity will serve 4 to 6 as a side dish, 3 to 4 as a vegetarian main course.
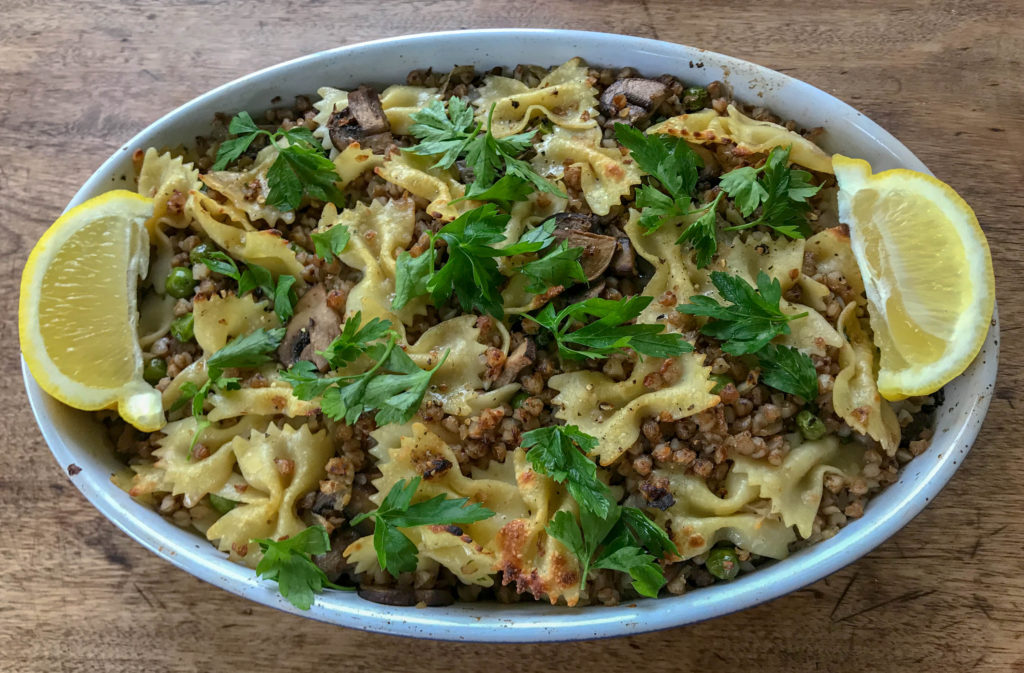
To set this all up ahead of time - which is great, particularly when the kasha is part of a larger meal that will already have you frazzled - just keep all the ingredients in the fridge overnight, either together or separate. When you're ready, preheat the oven to 350, put the kasha varnishkes into an ovenproof serving dish, and add a half cup of extra stock or water. Cover tightly and bake for 30 minutes, or until quite steamy. Remove cover, drizzle with the extra oil or butter, broil briefly to brown up, if you have time, and serve forth.
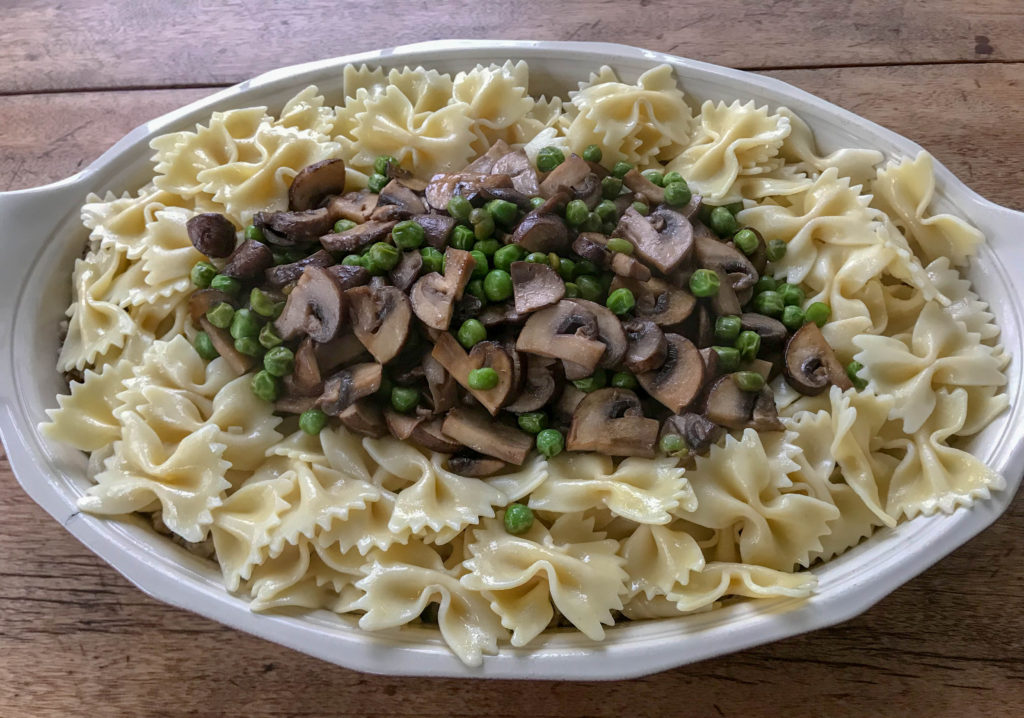
I do like to make kasha varnishkes ahead of time, and I do like mushrooms and peas, and I can't resist assembling the whole thing nicely on a plate for my guests to destroy as it's served, in which case you don't even see the buckwheat lurking below. I do the mushrooms separately because I like to fry the kasha with the onions - mushrooms will absorb all the fat, leaving none to coat the groats.
Now that we've settled that: fry the sliced mushrooms in the butter and oil over medium high heat until almost done, about 6 to 8 minutes. Add the frozen peas, salt and pepper to taste. Stir once or twice, until the peas defrost. Add the water or sherry, cover, reduce heat to medium, and let simmer another 2 or 3 minutes, until the peas are ready. Assemble and serve as described above; either right away or after a stint in the oven.
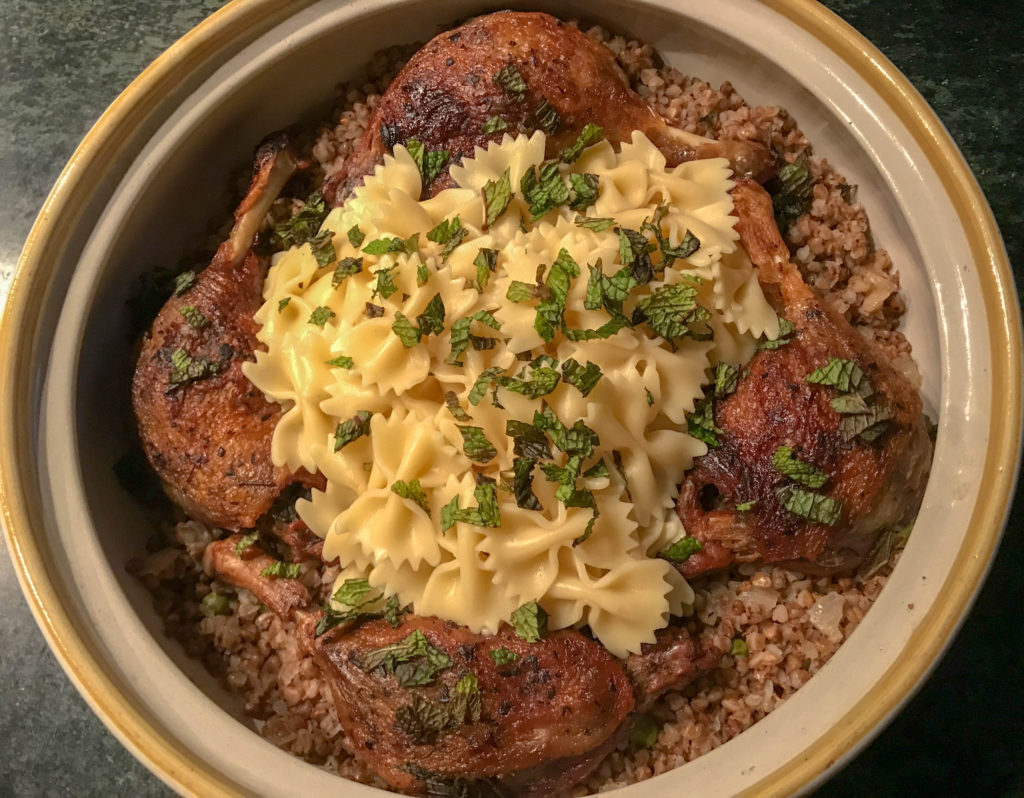
I got obsessed, at some point, with wanting to roast some duck legs to make ducky varnishkes. I thought the duck - and the duck fat - would go particularly well with the kasha. I was right on both counts, but what was really nice was to shred the very well-cooked duck meat into the grains and eat it in incorporated bites. It would be worth doing a couple of extra duck legs so you could premix them in, as well as serve them on the side. Maybe with chickpeas. Maybe next time.
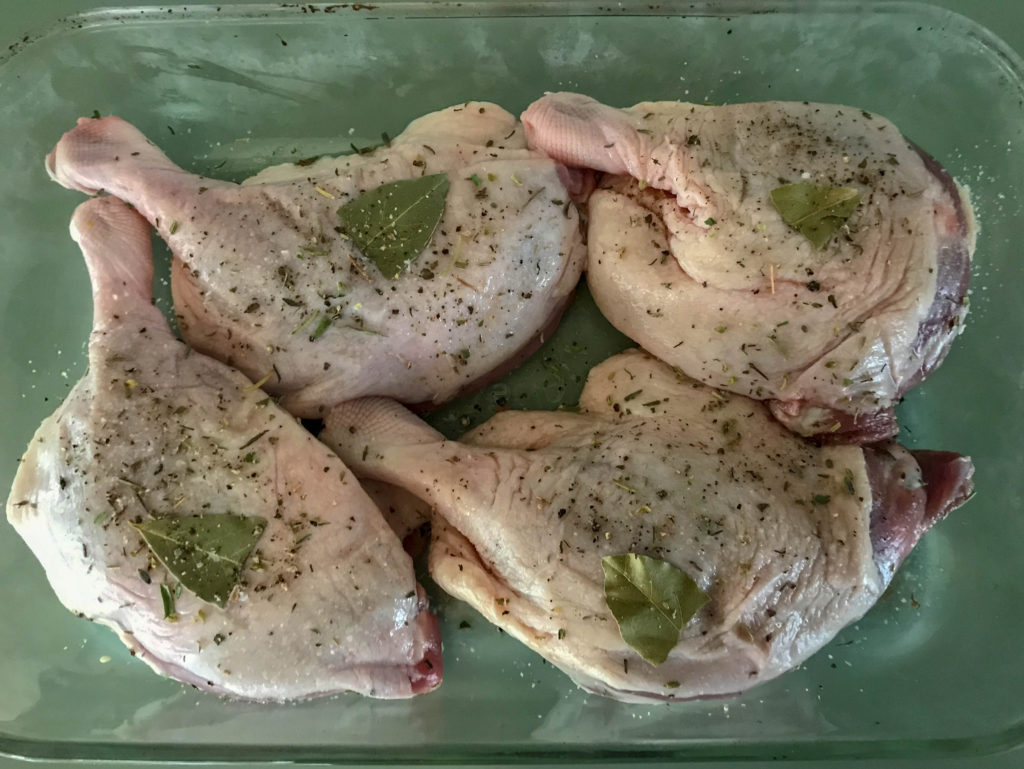
To roast the duck, we'll tweak a popular NY Times recipe from the redoubtable and prolific Melissa Clark for Easy Duck Confit. Start a day or two ahead of time and give it a cure - sprinkle on the salt and pepper and the herbs, and let it sit overnight in the fridge. The next day, preheat oven to 325. Remove the bay leaves and saute the duck legs, skin side down, in a large ovenproof skillet over medium heat, about 20 to 25 minutes. You should have gently browned skin, and a good quarter inch of fat.
Flip the duck legs skin side up, cover the pan tightly with foil, and roast for an hour and a half. Remove the foil and roast another half hour, or until the skin is quite crisp. Drain and reserve the precious duck fat.
When you make the kasha varnishkes, use the duck fat to saute the onions and the kasha grains before boiling them together and adding the bowties, etc. For this recipe, it makes good logistical sense to arrange the duck legs over the kasha and reheat in the aforementioned 350 degree oven for a half hour, tightly covered. To serve, toss the cooked pasta in the remaining duck fat, then pile the noodles into the center of the serving dish, and garnish with parsley or mint.
Ingredients
Directions
Pretend your box of buckwheat is like an elementary school. Your goal is to let each little groat shine on its own. So to start with, buy whole grain kasha, as opposed to coarse, medium or fine. Then, raise its self-esteem: feed it some protein, then rub it up with a little schmaltz before you pour on the hot water.
Kasha Varnishkes is most often made as a side dish to accompany some type of juicy roast, but it also makes a serious vegetarian main. You have the further choice of assembling and serving the same day, or letting things rest until you're ready. The components do well with a time out in the fridge, a final assembly, and a brief sprint in the oven. In the directions below, we'll try and have it every possible way.
In a large fry pan, saute the diced onion in the 2 T of fat or oil over medium heat until golden, about 8 to 10 minutes. Meanwhile, pour the dry buckwheat grains into a large saucepan or medium casserole, and mix in the beaten egg. Turn the heat to medium high and stir very frequently, until the mixture is no longer clumpy. In about 8 to 10 minutes, the grains should separate, you'll have a nice toasty smell, and the buckwheat may color a little bit - don't let it burn.
Scrape the onion mixture into the kasha pot and continue cooking and stirring another minute or two, to seal the groats in onion-flavored fat. Add the water or broth, and the salt and pepper. Bring all to a boil, then cover and let simmer, without stirring, over low heat until all, or nearly all, of the liquid is absorbed - about 30 minutes. Remove from heat, place a folded dish towel between the pot and its lid, and let it sit for another 10 or 15 minutes.
To proceed right away to the varnishke stage, keep the kasha warm in its pot while you boil up the pasta as per usual, or per the package directions. Drain well. Fluff the kasha into the pasta pot, adjust seasonings, then turn into a serving dish. Drizzle with the extra 2 T of melted butter or a nice flavored oil like basil EVOO or walnut. Or - if you have a few minutes and can pay attention - run the dish under the broiler until just a few of the outermost pasta pieces get a bit brown and crispy at the edges. This quantity will serve 4 to 6 as a side dish, 3 to 4 as a vegetarian main course.

To set this all up ahead of time - which is great, particularly when the kasha is part of a larger meal that will already have you frazzled - just keep all the ingredients in the fridge overnight, either together or separate. When you're ready, preheat the oven to 350, put the kasha varnishkes into an ovenproof serving dish, and add a half cup of extra stock or water. Cover tightly and bake for 30 minutes, or until quite steamy. Remove cover, drizzle with the extra oil or butter, broil briefly to brown up, if you have time, and serve forth.
I do like to make kasha varnishkes ahead of time, and I do like mushrooms and peas, and I can't resist assembling the whole thing nicely on a plate for my guests to destroy as it's served, in which case you don't even see the buckwheat lurking below. I do the mushrooms separately because I like to fry the kasha with the onions - mushrooms will absorb all the fat, leaving none to coat the groats.
Now that we've settled that: fry the sliced mushrooms in the butter and oil over medium high heat until almost done, about 6 to 8 minutes. Add the frozen peas, salt and pepper to taste. Stir once or twice, until the peas defrost. Add the water or sherry, cover, reduce heat to medium, and let simmer another 2 or 3 minutes, until the peas are ready. Assemble and serve as described above; either right away or after a stint in the oven.

I got obsessed, at some point, with wanting to roast some duck legs to make ducky varnishkes. I thought the duck - and the duck fat - would go particularly well with the kasha. I was right on both counts, but what was really nice was to shred the very well-cooked duck meat into the grains and eat it in incorporated bites. It would be worth doing a couple of extra duck legs so you could premix them in, as well as serve them on the side. Maybe with chickpeas. Maybe next time.

To roast the duck, we'll tweak a popular NY Times recipe from the redoubtable and prolific Melissa Clark for Easy Duck Confit. Start a day or two ahead of time and give it a cure - sprinkle on the salt and pepper and the herbs, and let it sit overnight in the fridge. The next day, preheat oven to 325. Remove the bay leaves and saute the duck legs, skin side down, in a large ovenproof skillet over medium heat, about 20 to 25 minutes. You should have gently browned skin, and a good quarter inch of fat.

Flip the duck legs skin side up, cover the pan tightly with foil, and roast for an hour and a half. Remove the foil and roast another half hour, or until the skin is quite crisp. Drain and reserve the precious duck fat.
When you make the kasha varnishkes, use the duck fat to saute the onions and the kasha grains before boiling them together and adding the bowties, etc. For this recipe, it makes good logistical sense to arrange the duck legs over the kasha and reheat in the aforementioned 350 degree oven for a half hour, tightly covered. To serve, toss the cooked pasta in the remaining duck fat, then pile the noodles into the center of the serving dish, and garnish with parsley or mint.
_____________________
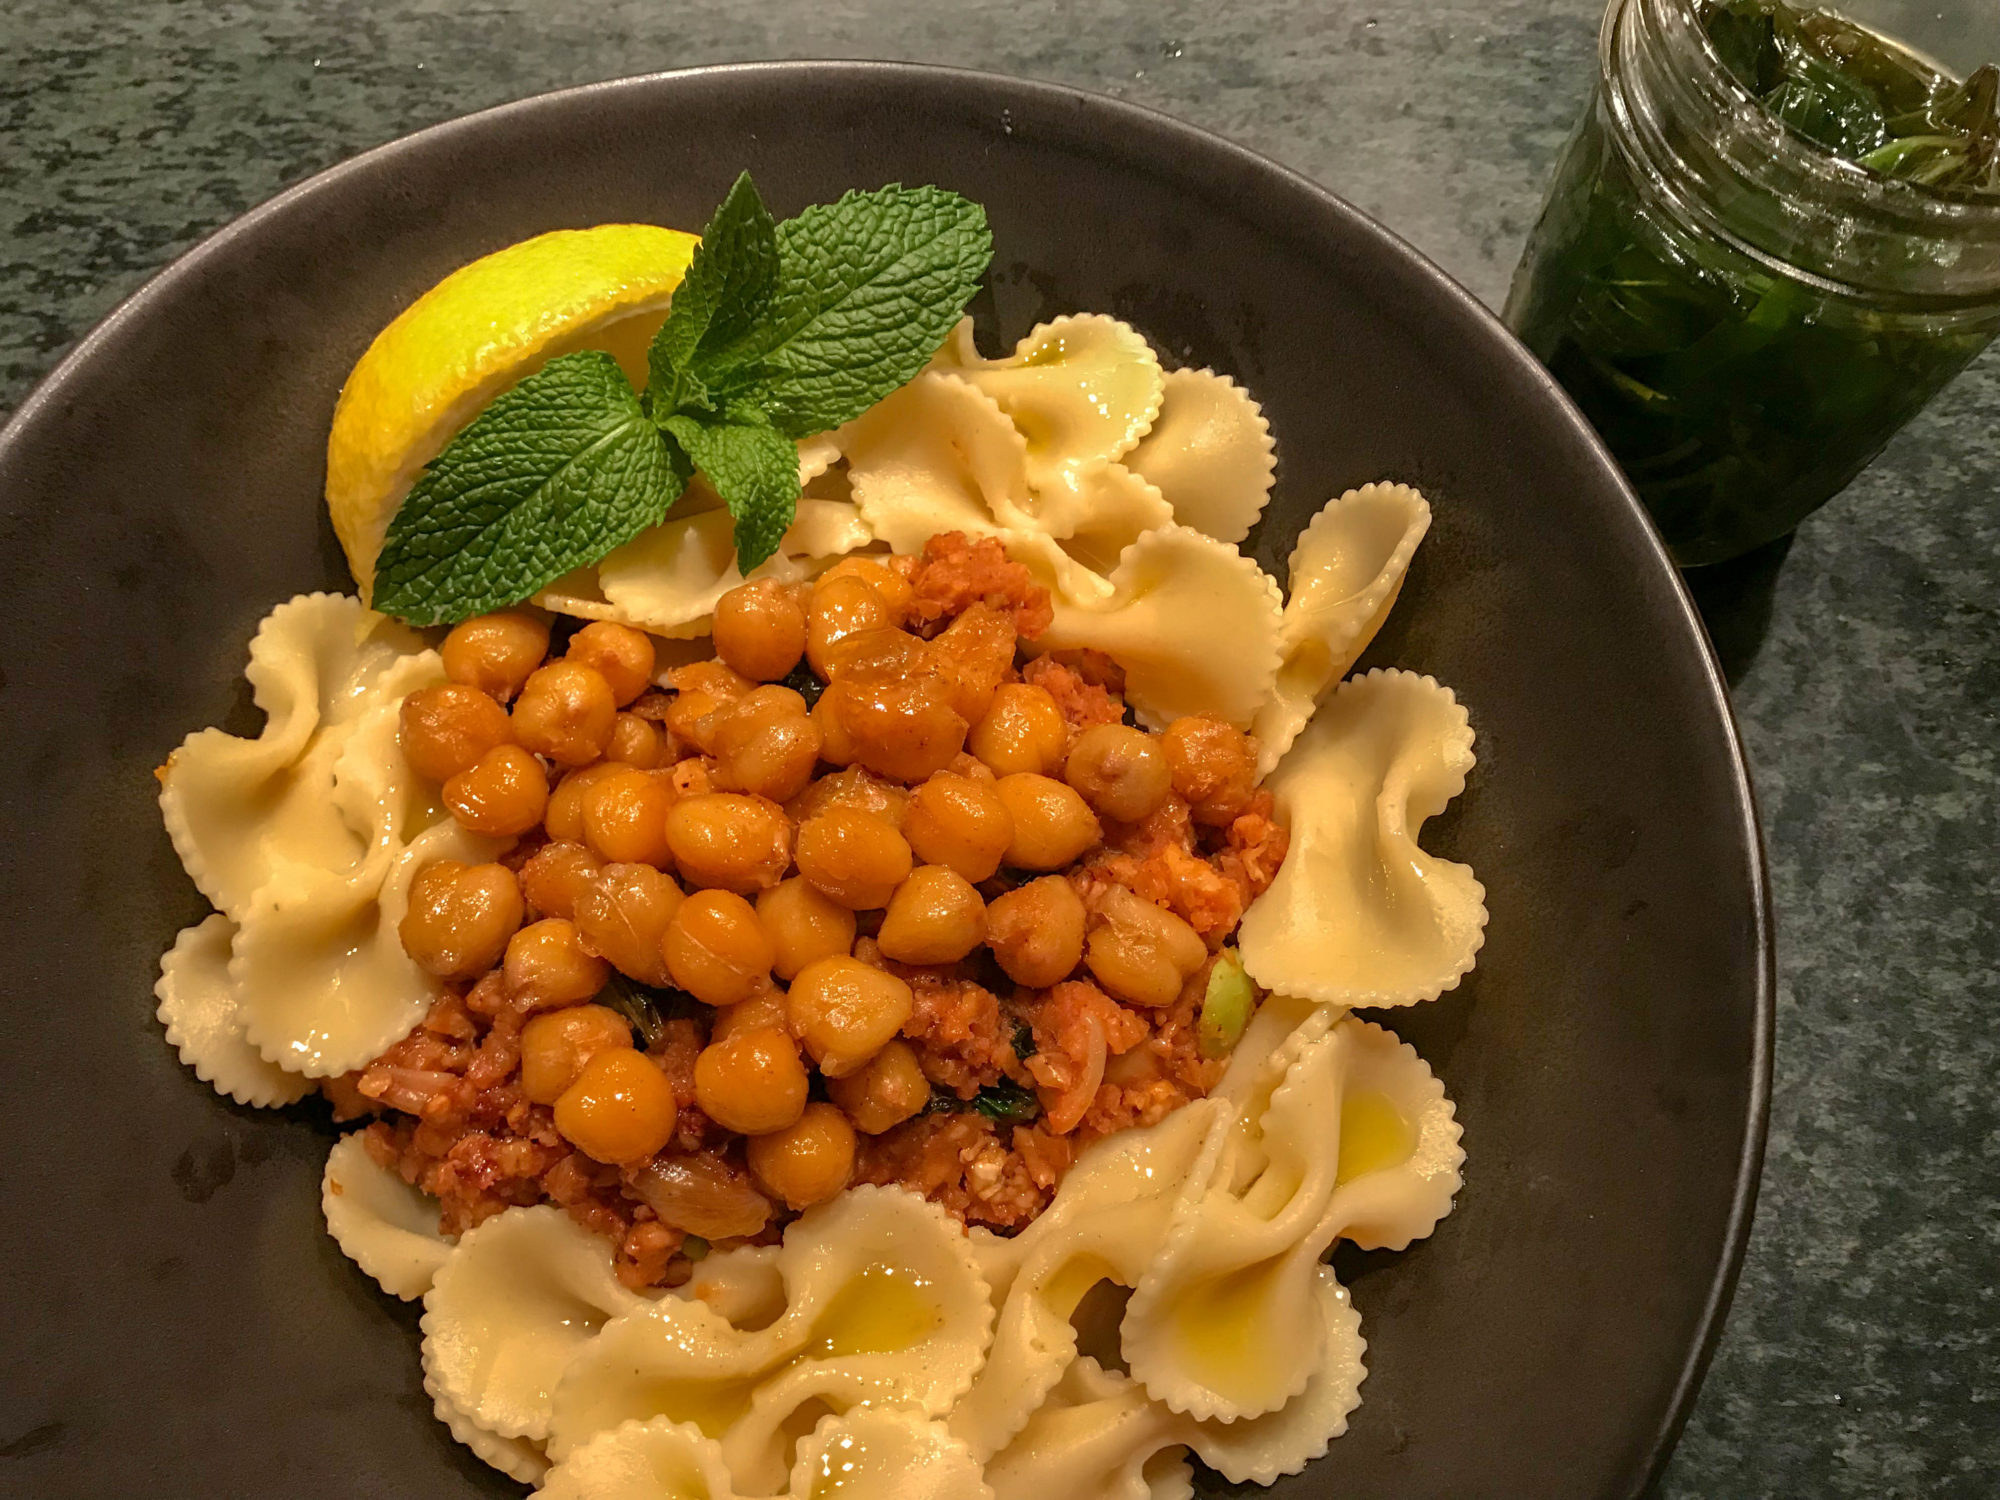
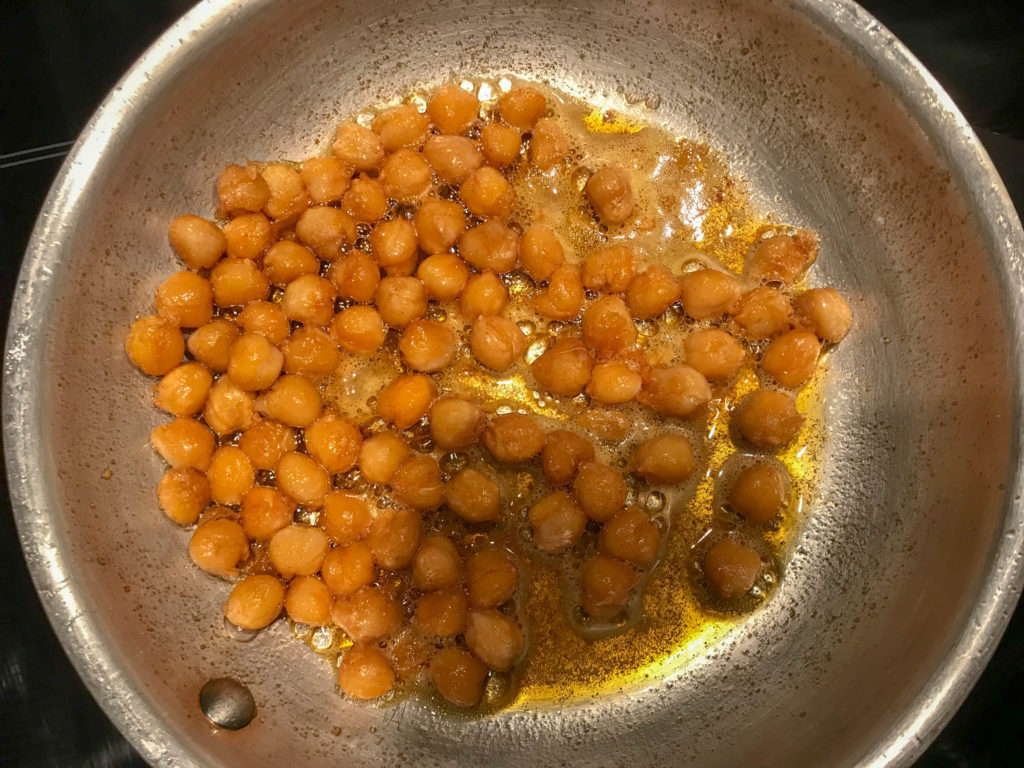
Vegan Varnishkes is for my vegan niece. I love her to death and respect her choices, and I do hate seeing her bring her little ersatz sausage patties to family dinners, asking politely for a bit of space on the stovetop as we get ready to slice a ham. To make this, I souped up the flavor and protein profile by cooking the buckwheat in tomato juice, and added soybeans and chickpeas. I also saute about half the garbanzos in generous olive oil with a sprinkle of smoked paprika, to make a flavored drizzle for the plate. That and fresh mint, if you have it, make a great, slightly exotic finish for this filling dish.
Vegan Varnishkes
Tomato juice adds flavor, chickpeas and soybeans lend extra protein to this vegan comfort dish.
In a large saucepan or medium stovetop casserole dish, saute the onion in the olive oil over medium-high heat until tender, then add the kasha. Stir another minute or two to coat the kasha grains, then add the annato or turmeric and the tomato paste, stirring and tossing to distribute.
Dilute the tomato juice with water to make up two cups of liquid, and add to the kasha mixture with the salt, cooked (defrosted) soybeans and 1/2 cup of the chickpeas. Bring to a boil, then cover and simmer about 10 minutes, or until the liquid is absorbed and the grains are just tender. When done, remove from the heat, cover the pot opening with a folded kitchen towel or several layers of paper towels, top with the pot lid, and let rest.
While the kasha cooks, boil up about two quarts of salted water, and have ready at a simmer for the pasta. If all goes well, you'll put the pasta in to start cooking just before the kasha is done - but note that while the kasha can rest for quite a while on the stovetop, you don't want the cooked pasta to sit around, waiting for something else. When I myself am caught in this common situation, I like to add a couple of cups of cold water to the pasta pot, to stop it cooking but still leave it warm.
Meanwhile - heat the extra 2 T of olive oil in a saute pan and add the other 1/2 cup of chickpeas. Saute over medium high heat until the chickpeas start to firm up and brown, about 3 or 4 minutes. Add the paprika and toss until fragrant, then set aside.
When all is ready, drain the chickpea oil into the kasha and stir it in, along with the chopped fresh mint. Spoon into large bowls, then ring the kasha with the warm, cooked pasta. Add the sauteed chickpeas into the center, and garnish with a mint tip and a wedge of lemon. Serve with extra lemon wedges and some basil or other flavored oil, if you have it. Serves 2 or 3 as a main dish; 4 to 6 as a side.
Ingredients
Directions
In a large saucepan or medium stovetop casserole dish, saute the onion in the olive oil over medium-high heat until tender, then add the kasha. Stir another minute or two to coat the kasha grains, then add the annato or turmeric and the tomato paste, stirring and tossing to distribute.
Dilute the tomato juice with water to make up two cups of liquid, and add to the kasha mixture with the salt, cooked (defrosted) soybeans and 1/2 cup of the chickpeas. Bring to a boil, then cover and simmer about 10 minutes, or until the liquid is absorbed and the grains are just tender. When done, remove from the heat, cover the pot opening with a folded kitchen towel or several layers of paper towels, top with the pot lid, and let rest.
While the kasha cooks, boil up about two quarts of salted water, and have ready at a simmer for the pasta. If all goes well, you'll put the pasta in to start cooking just before the kasha is done - but note that while the kasha can rest for quite a while on the stovetop, you don't want the cooked pasta to sit around, waiting for something else. When I myself am caught in this common situation, I like to add a couple of cups of cold water to the pasta pot, to stop it cooking but still leave it warm.
Meanwhile - heat the extra 2 T of olive oil in a saute pan and add the other 1/2 cup of chickpeas. Saute over medium high heat until the chickpeas start to firm up and brown, about 3 or 4 minutes. Add the paprika and toss until fragrant, then set aside.

When all is ready, drain the chickpea oil into the kasha and stir it in, along with the chopped fresh mint. Spoon into large bowls, then ring the kasha with the warm, cooked pasta. Add the sauteed chickpeas into the center, and garnish with a mint tip and a wedge of lemon. Serve with extra lemon wedges and some basil or other flavored oil, if you have it. Serves 2 or 3 as a main dish; 4 to 6 as a side.
_____________________
So Kasha Varnishkes doesn’t float your boat? Well, dammit, I did my best. I showed you how to cook it so the grains stay separate. I talked it up, added tasty fats, gave it a bit of context and even duck and vegan versions, and still, you turn up your nose? Unfortunately, you have company among some in my immediate family, who think it’s kind of blah. Maybe it’s just one of those things you have to have had as a kid. Maybe it just really needs to have brisket gravy poured all over it.
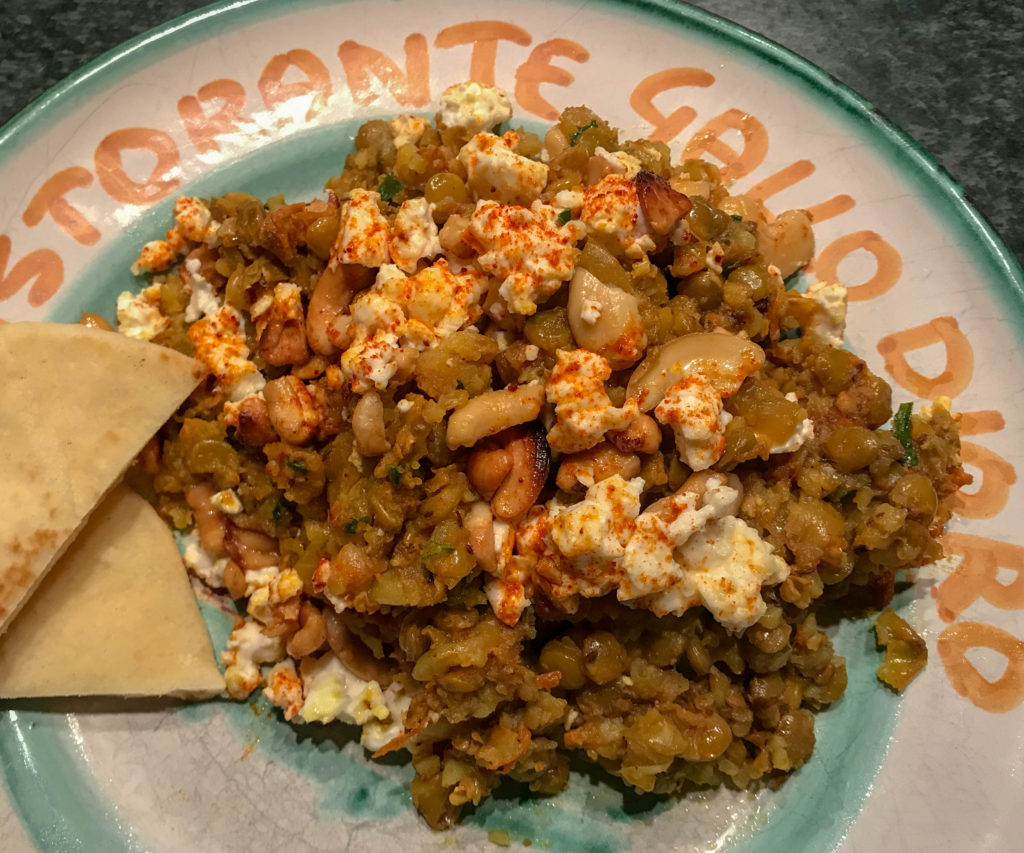
Let’s move on. This Good Housekeeping/Food52 mashup Kasha and Lentil Skillet with Feta dinner has moved right into our twice-weekly vegetarian weeknight rotation. It has it all: Whole grains. Legumes. Flavor. Cheese. Nuts. Exotic spices. Yummy fats poured on at the end, so you can regulate how much you deserve. Also, it’s ready in less than an hour, with plenty of time to make a salad and warm up some naan or pita.
In the interests of time and simplicity we forgo the egg and let the buckwheat and lentils form a mutually agreeable coalition, crumbly yet tender. Nuts add crunch, the broiler adds roastiness, and meat would add nothing. You could serve it with rice, but it’s perfect just with flatbread and mint chutney.
Kasha and Lentil Skillet with Feta
This skillet dinner has gone right into our twice-weekly vegetarian rotation.
Start to finish, we'll use a heavy, 12" cast iron or other ovenproof skillet. If you're using whole spices, toast the coriander, cumin and fennel seeds for a few minutes over medium heat, before you add any oil to the pan. Tilt out the spices, let cool, grind in a mortar or electric mill, and mix with the oregano, cayenne and turmeric. If you love turmeric, use the larger amount. If you don't love turmeric yet, try the amazing variety sold by Burlap and Barrel. Set the spices aside
Saute the diced onion in the 2 T of oil over medium high heat until soft and a bit golden, about 6 - 8 minutes. Add the reserved spices and cook another minute or two, until very fragrant. Add the tomatoes and cook down for another 2 or 3 minutes, then add the kasha, lentils, water and salt. Bring all to a boil, then lower to a simmer and cover tightly.
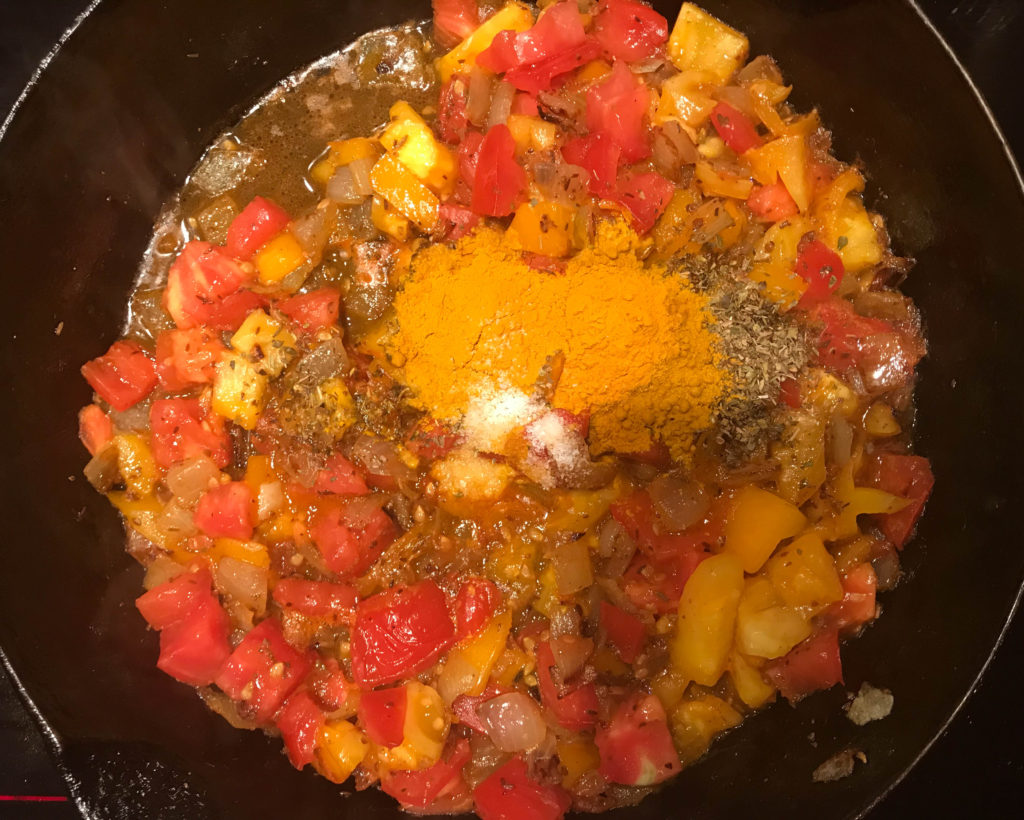
Overall, this will cook a bit like rice - just let it steam, undisturbed, for a time. After 25 minutes, check the grains for doneness - meaning, eat half a forkful. After no more than 35 minutes, all the water should be absorbed and both the kasha and the lentils should be tender and willing.
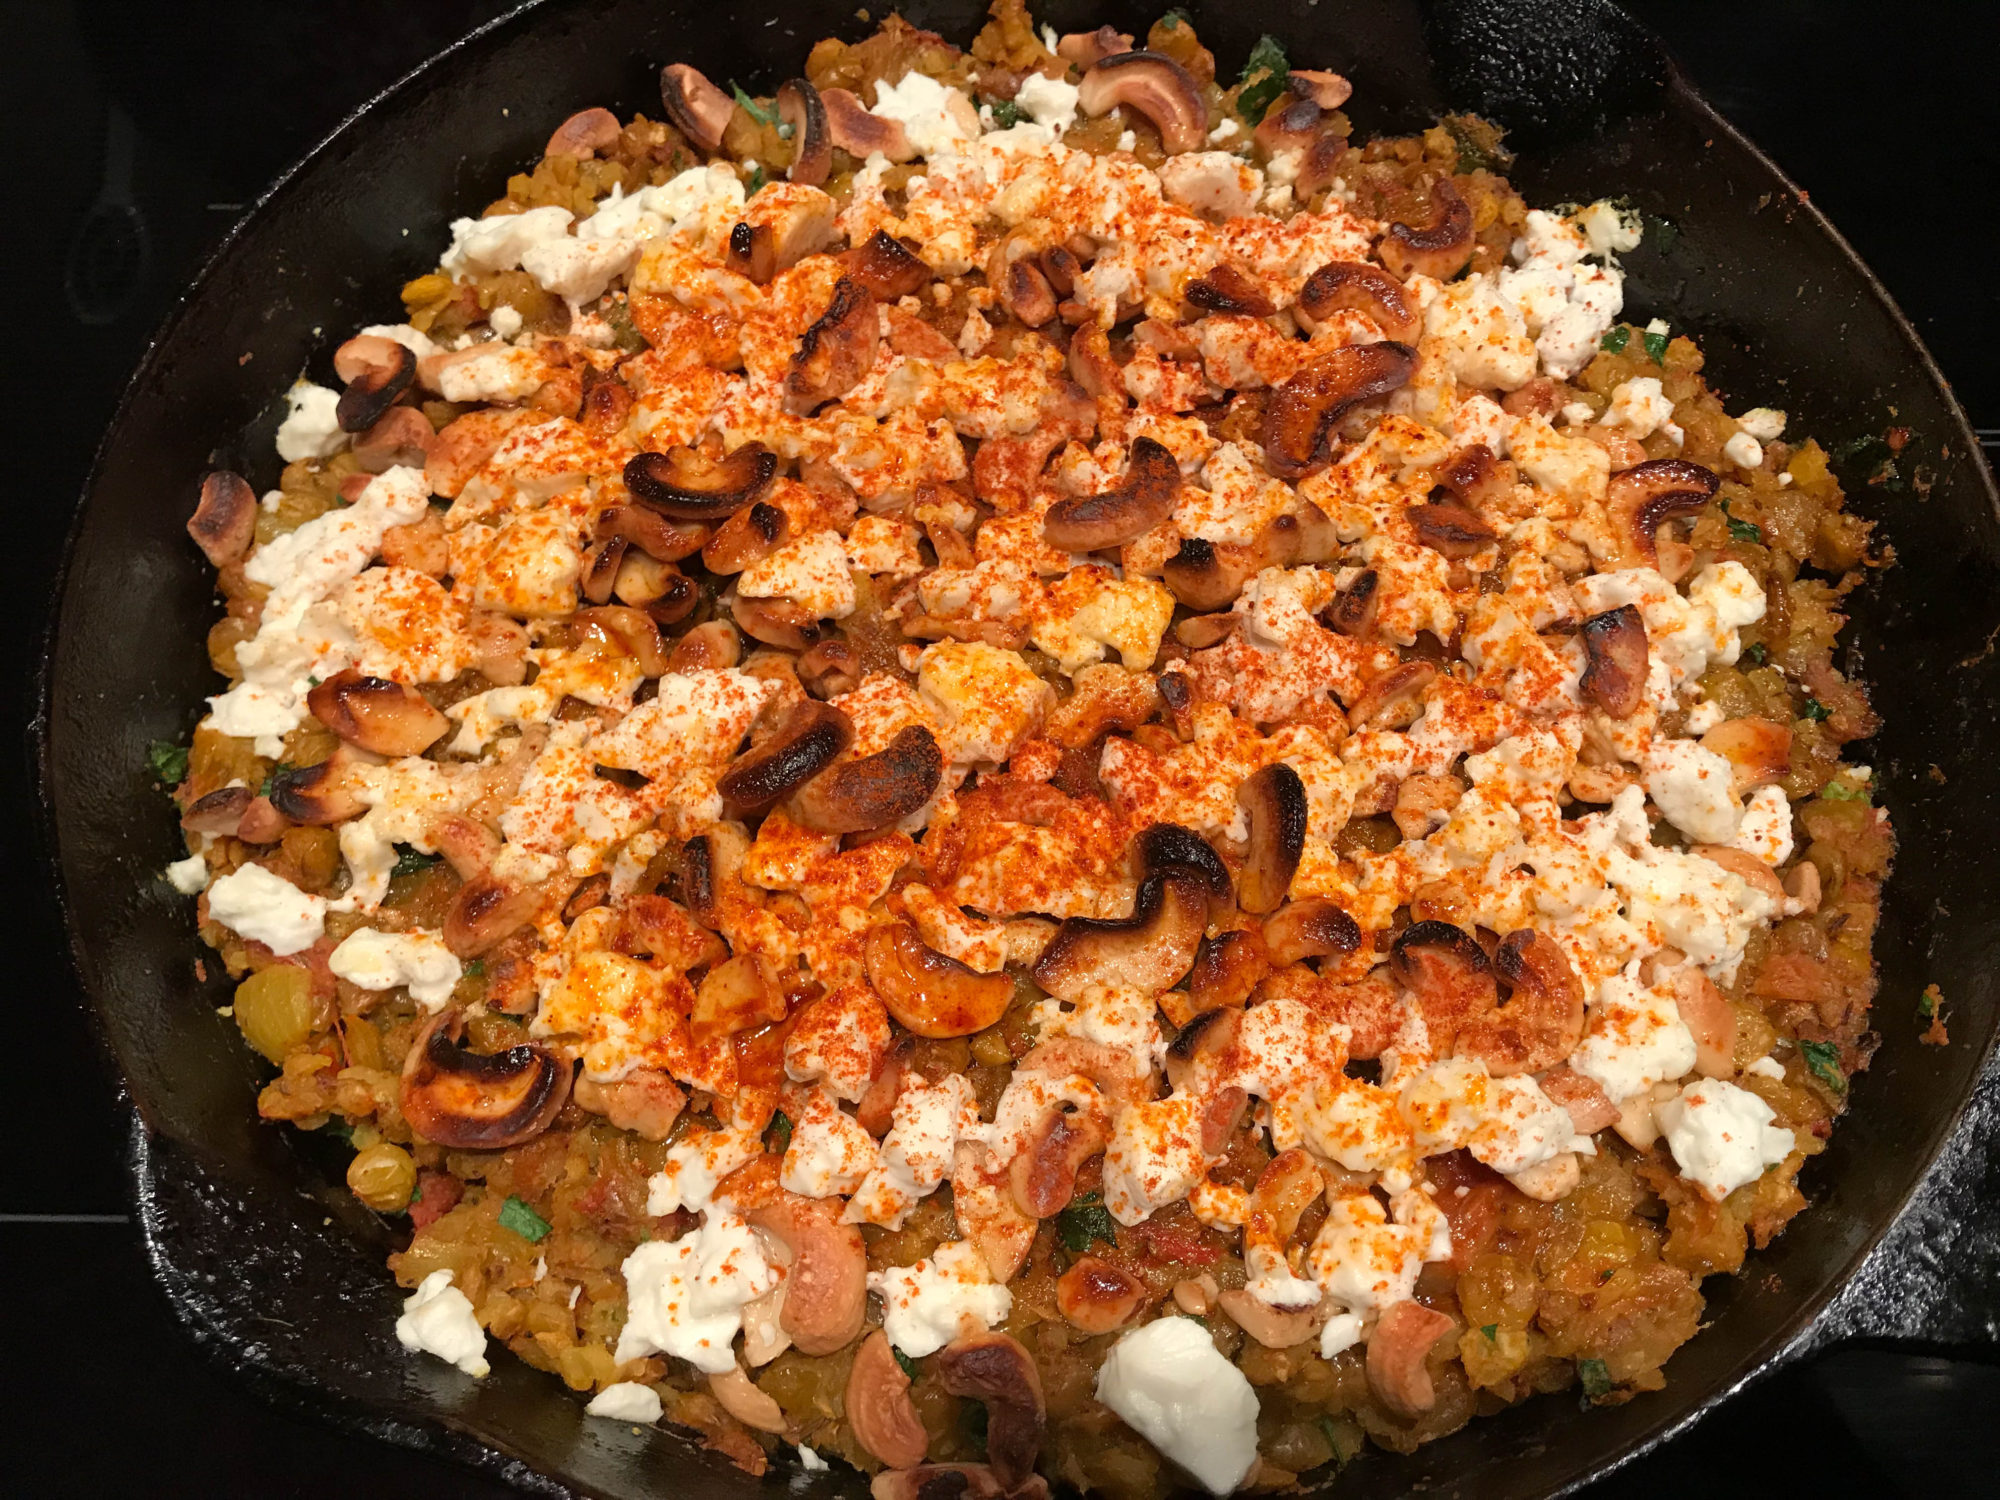
Preheat the broiler. Squeeze the half lemon over the dish, add the parsley, and carefully fluff up with a serving fork. Sprinkle with the nuts, then the crumbled feta. Drizzle on the oil - EVOO is fine, but let it share the limelight with a nut oil like walnut, almond or hazelnut, if you have it. Place the pan 3 to 4 inches under the broiler, and keep an eye on it. Remove, ideally, when the feta has a bit of color and the nuts are still unburned, perhaps 3 minutes. Perhaps less.
Plate up with a lemon wedge and serve with warm pita or naan and a variety of chutneys, or with rice and a salad. And if you, like me, are hoarding some very expensive argan oil, now is the time to show the women in your family how much you care about them, and how much you appreciate that they didn't put it on their hair - drizzle a generous teaspoon on each serving. Serves 4 as a main dish.
Ingredients
Directions
Start to finish, we'll use a heavy, 12" cast iron or other ovenproof skillet. If you're using whole spices, toast the coriander, cumin and fennel seeds for a few minutes over medium heat, before you add any oil to the pan. Tilt out the spices, let cool, grind in a mortar or electric mill, and mix with the oregano, cayenne and turmeric. If you love turmeric, use the larger amount. If you don't love turmeric yet, try the amazing variety sold by Burlap and Barrel. Set the spices aside
Saute the diced onion in the 2 T of oil over medium high heat until soft and a bit golden, about 6 - 8 minutes. Add the reserved spices and cook another minute or two, until very fragrant. Add the tomatoes and cook down for another 2 or 3 minutes, then add the kasha, lentils, water and salt. Bring all to a boil, then lower to a simmer and cover tightly.

Overall, this will cook a bit like rice - just let it steam, undisturbed, for a time. After 25 minutes, check the grains for doneness - meaning, eat half a forkful. After no more than 35 minutes, all the water should be absorbed and both the kasha and the lentils should be tender and willing.
Preheat the broiler. Squeeze the half lemon over the dish, add the parsley, and carefully fluff up with a serving fork. Sprinkle with the nuts, then the crumbled feta. Drizzle on the oil - EVOO is fine, but let it share the limelight with a nut oil like walnut, almond or hazelnut, if you have it. Place the pan 3 to 4 inches under the broiler, and keep an eye on it. Remove, ideally, when the feta has a bit of color and the nuts are still unburned, perhaps 3 minutes. Perhaps less.
Plate up with a lemon wedge and serve with warm pita or naan and a variety of chutneys, or with rice and a salad. And if you, like me, are hoarding some very expensive argan oil, now is the time to show the women in your family how much you care about them, and how much you appreciate that they didn't put it on their hair - drizzle a generous teaspoon on each serving. Serves 4 as a main dish.

